

Flat
Sleek, depth-free design.
.jpg?width=750&name=2101521818087220494%20(1).jpg)
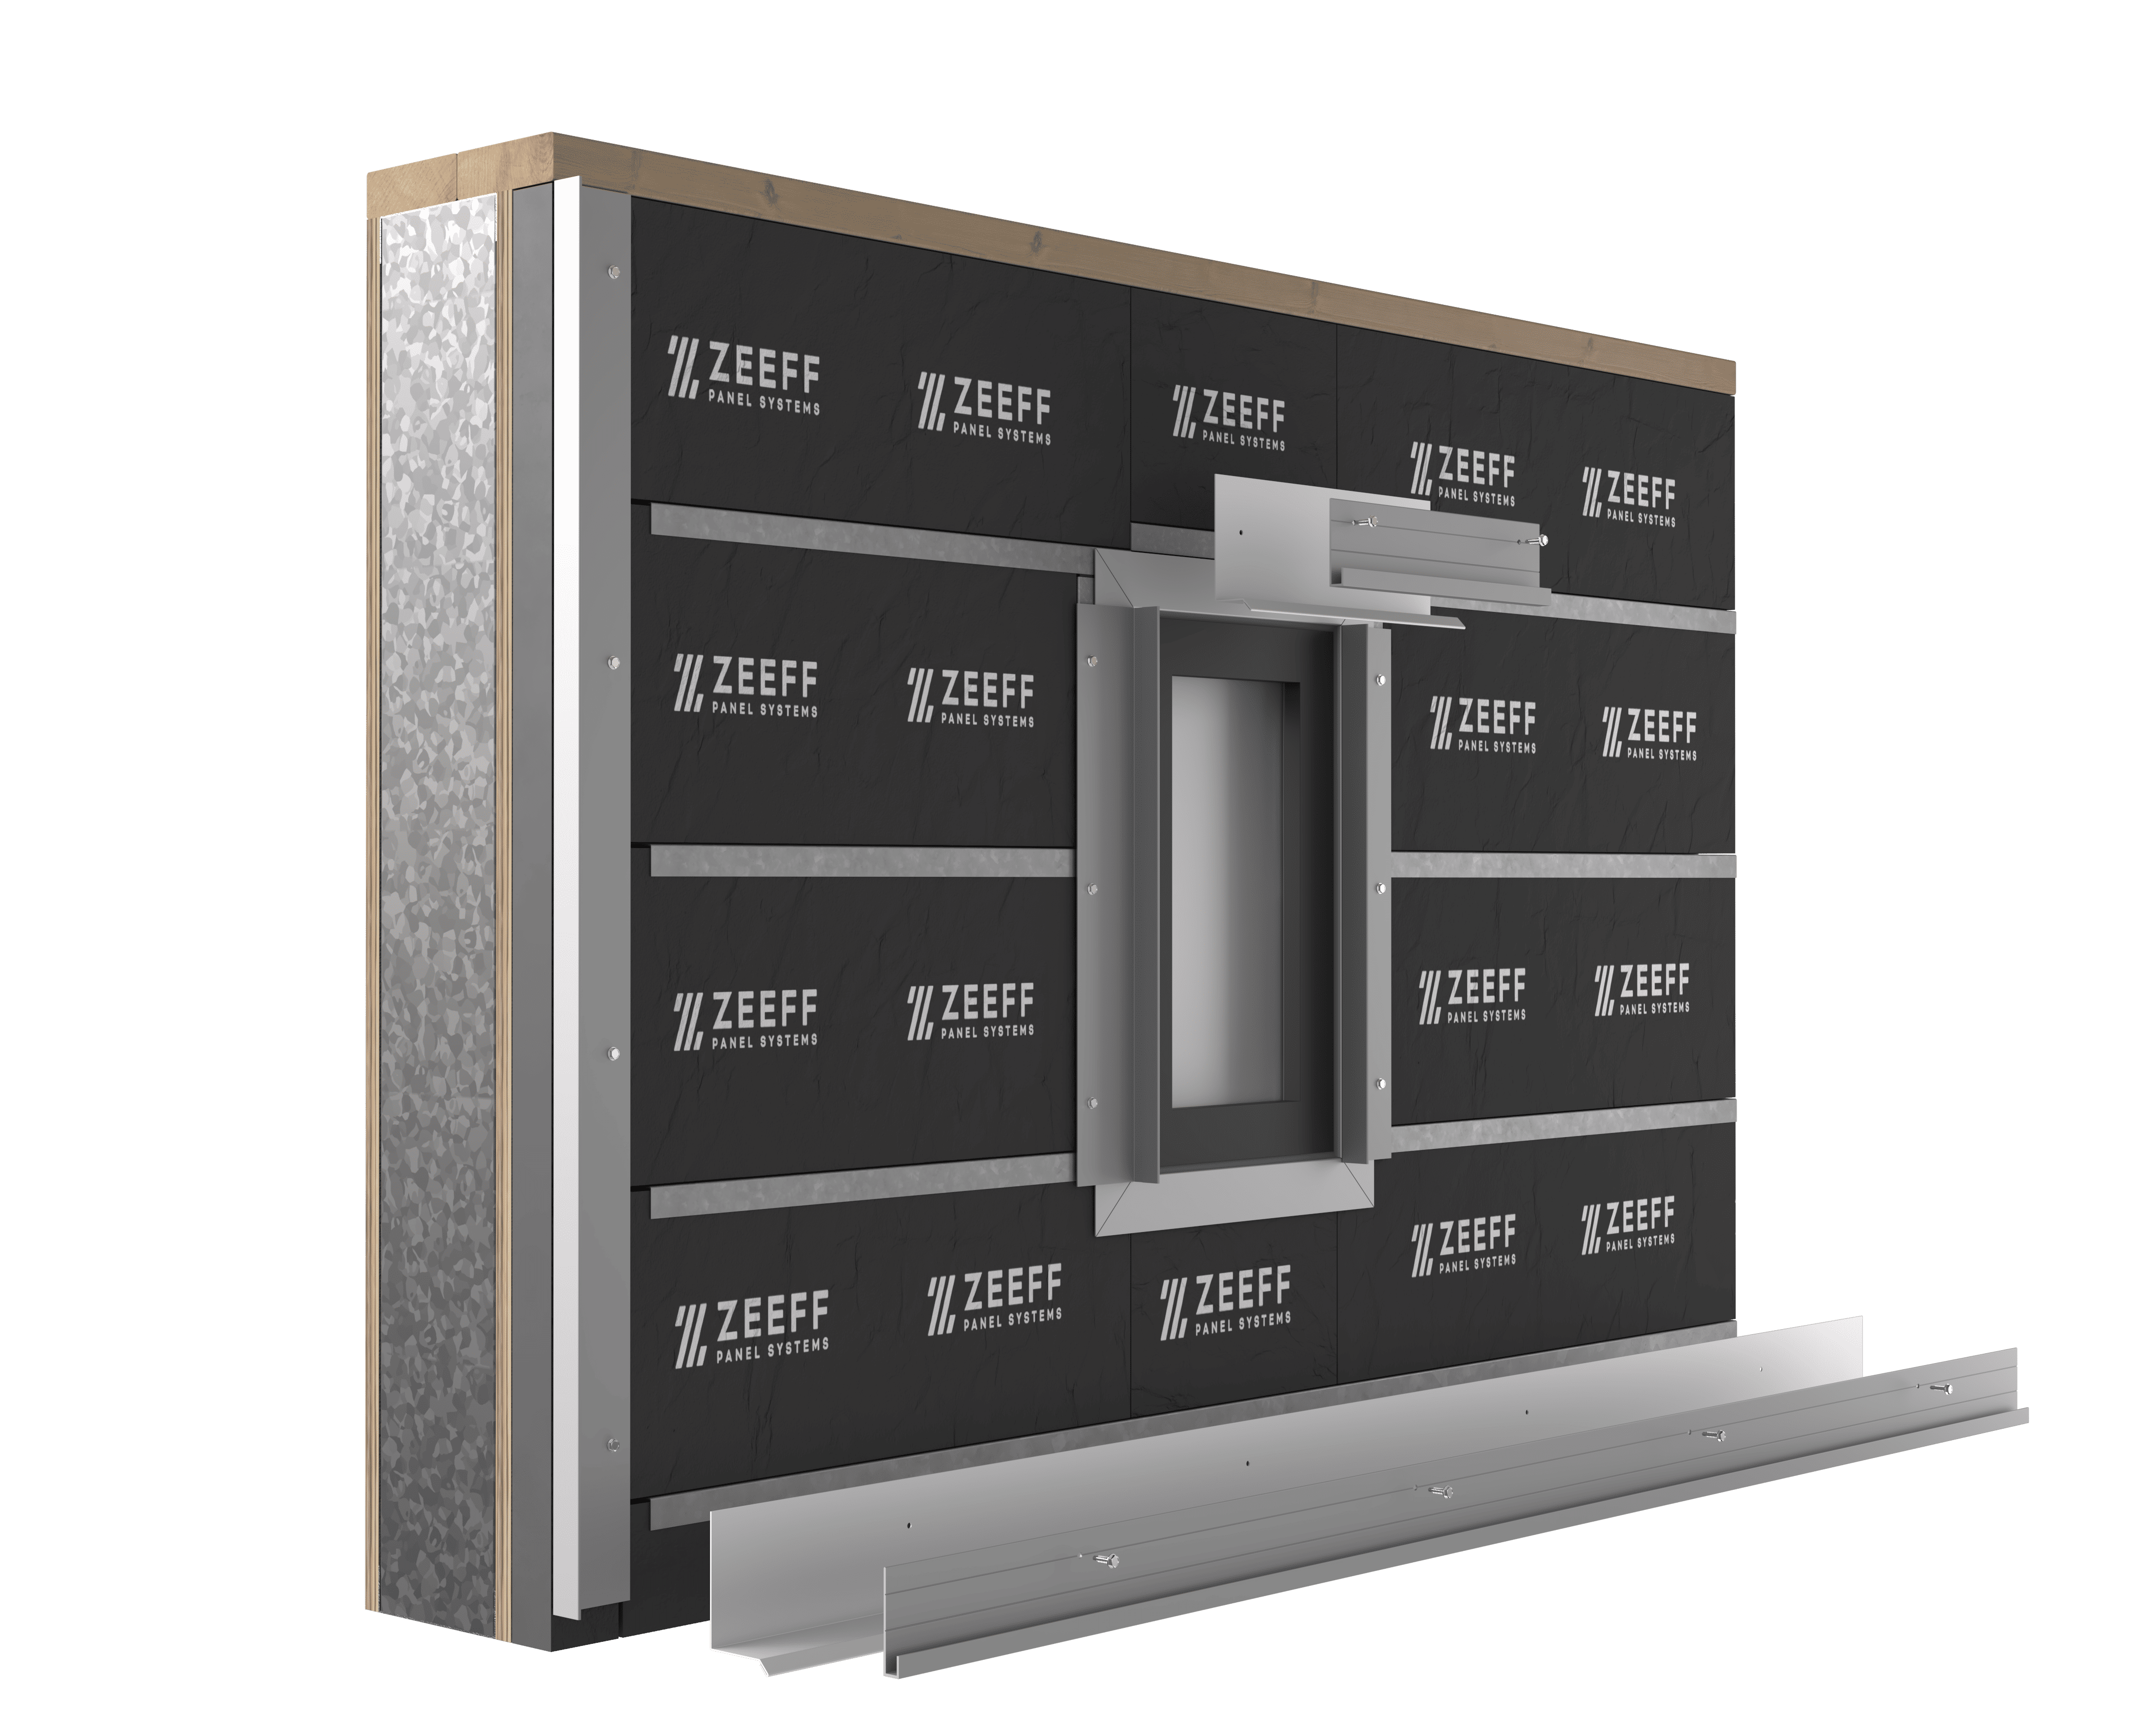
Install the small “J” starter extrusion where bottom panel engagement is needed.
Drill weep holes as needed and fasten it to the bottom of the work area.
Fasten the coping cleat before the installation of the coping cap and splice plate.
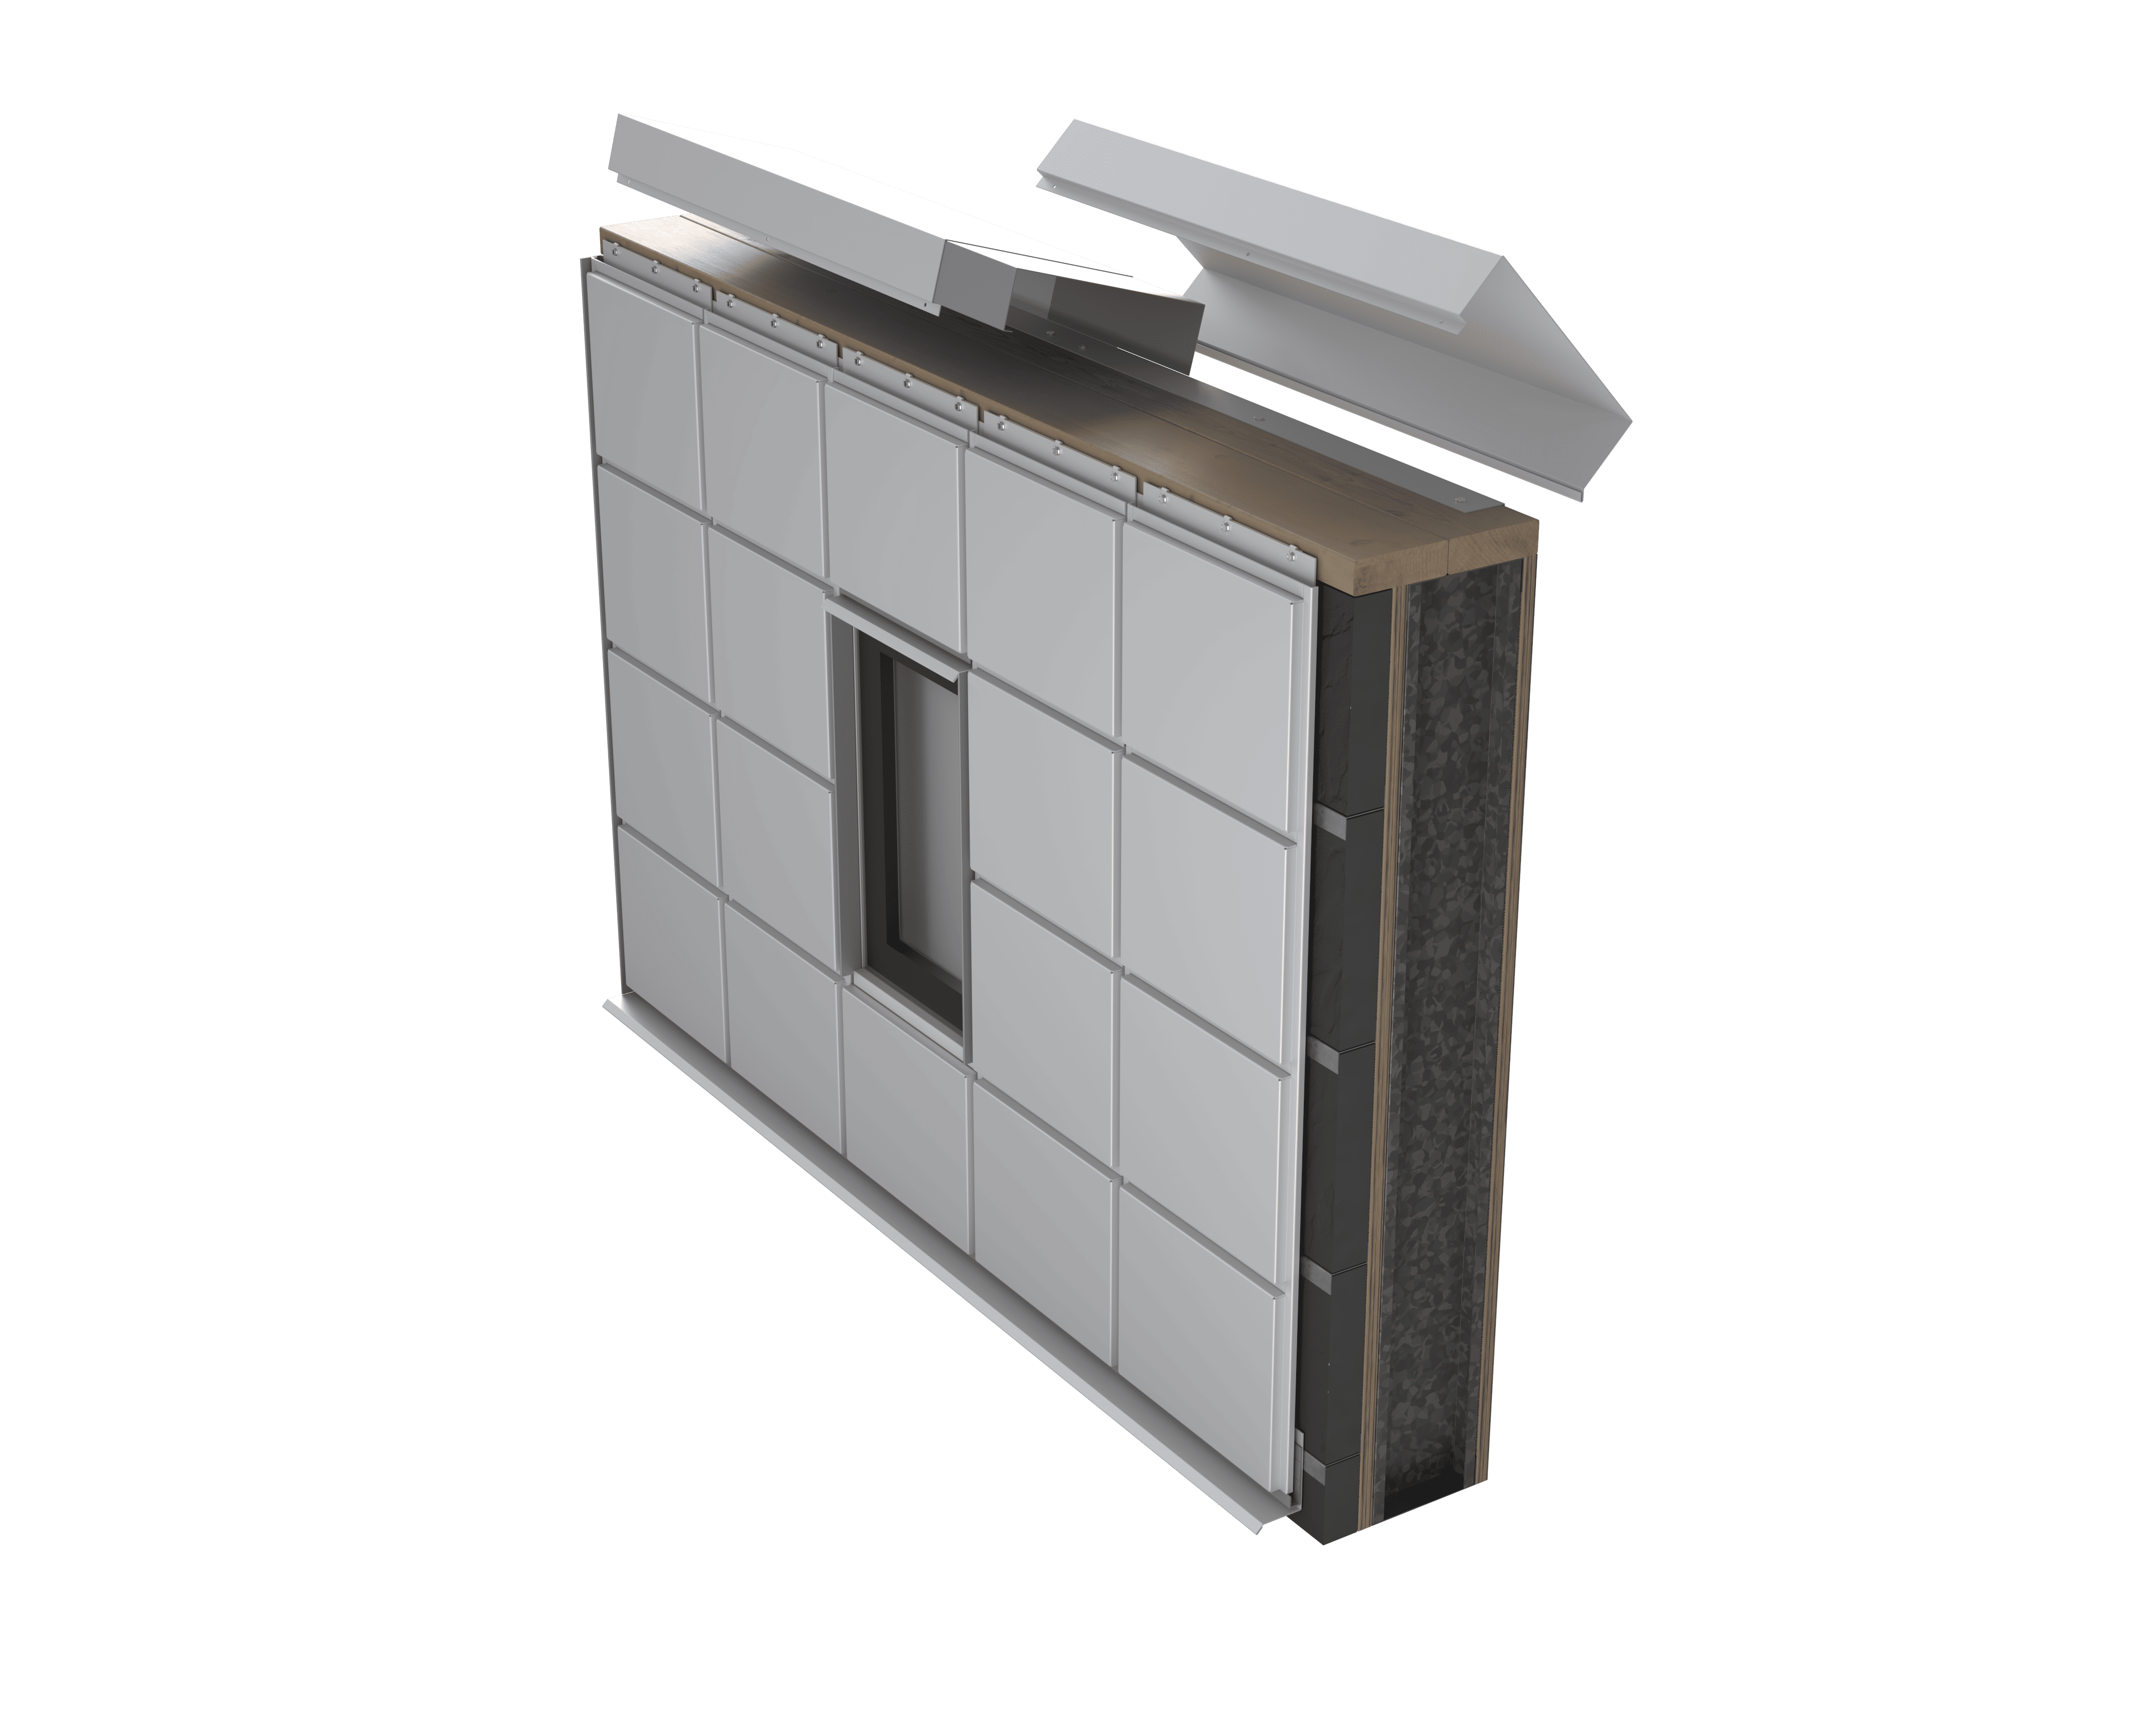
During installation, insert the splice plate into the coping cap. For integrated coping, secure it directly into the face of the panel’s J pocket.
ZPS supplies 6in. splice plates when coping is added to a purchase order.
%20(1).png?width=7500&name=1%20(1)%20(1).png)
%20(1).png?width=7500&name=4%20(1)%20(1).png)
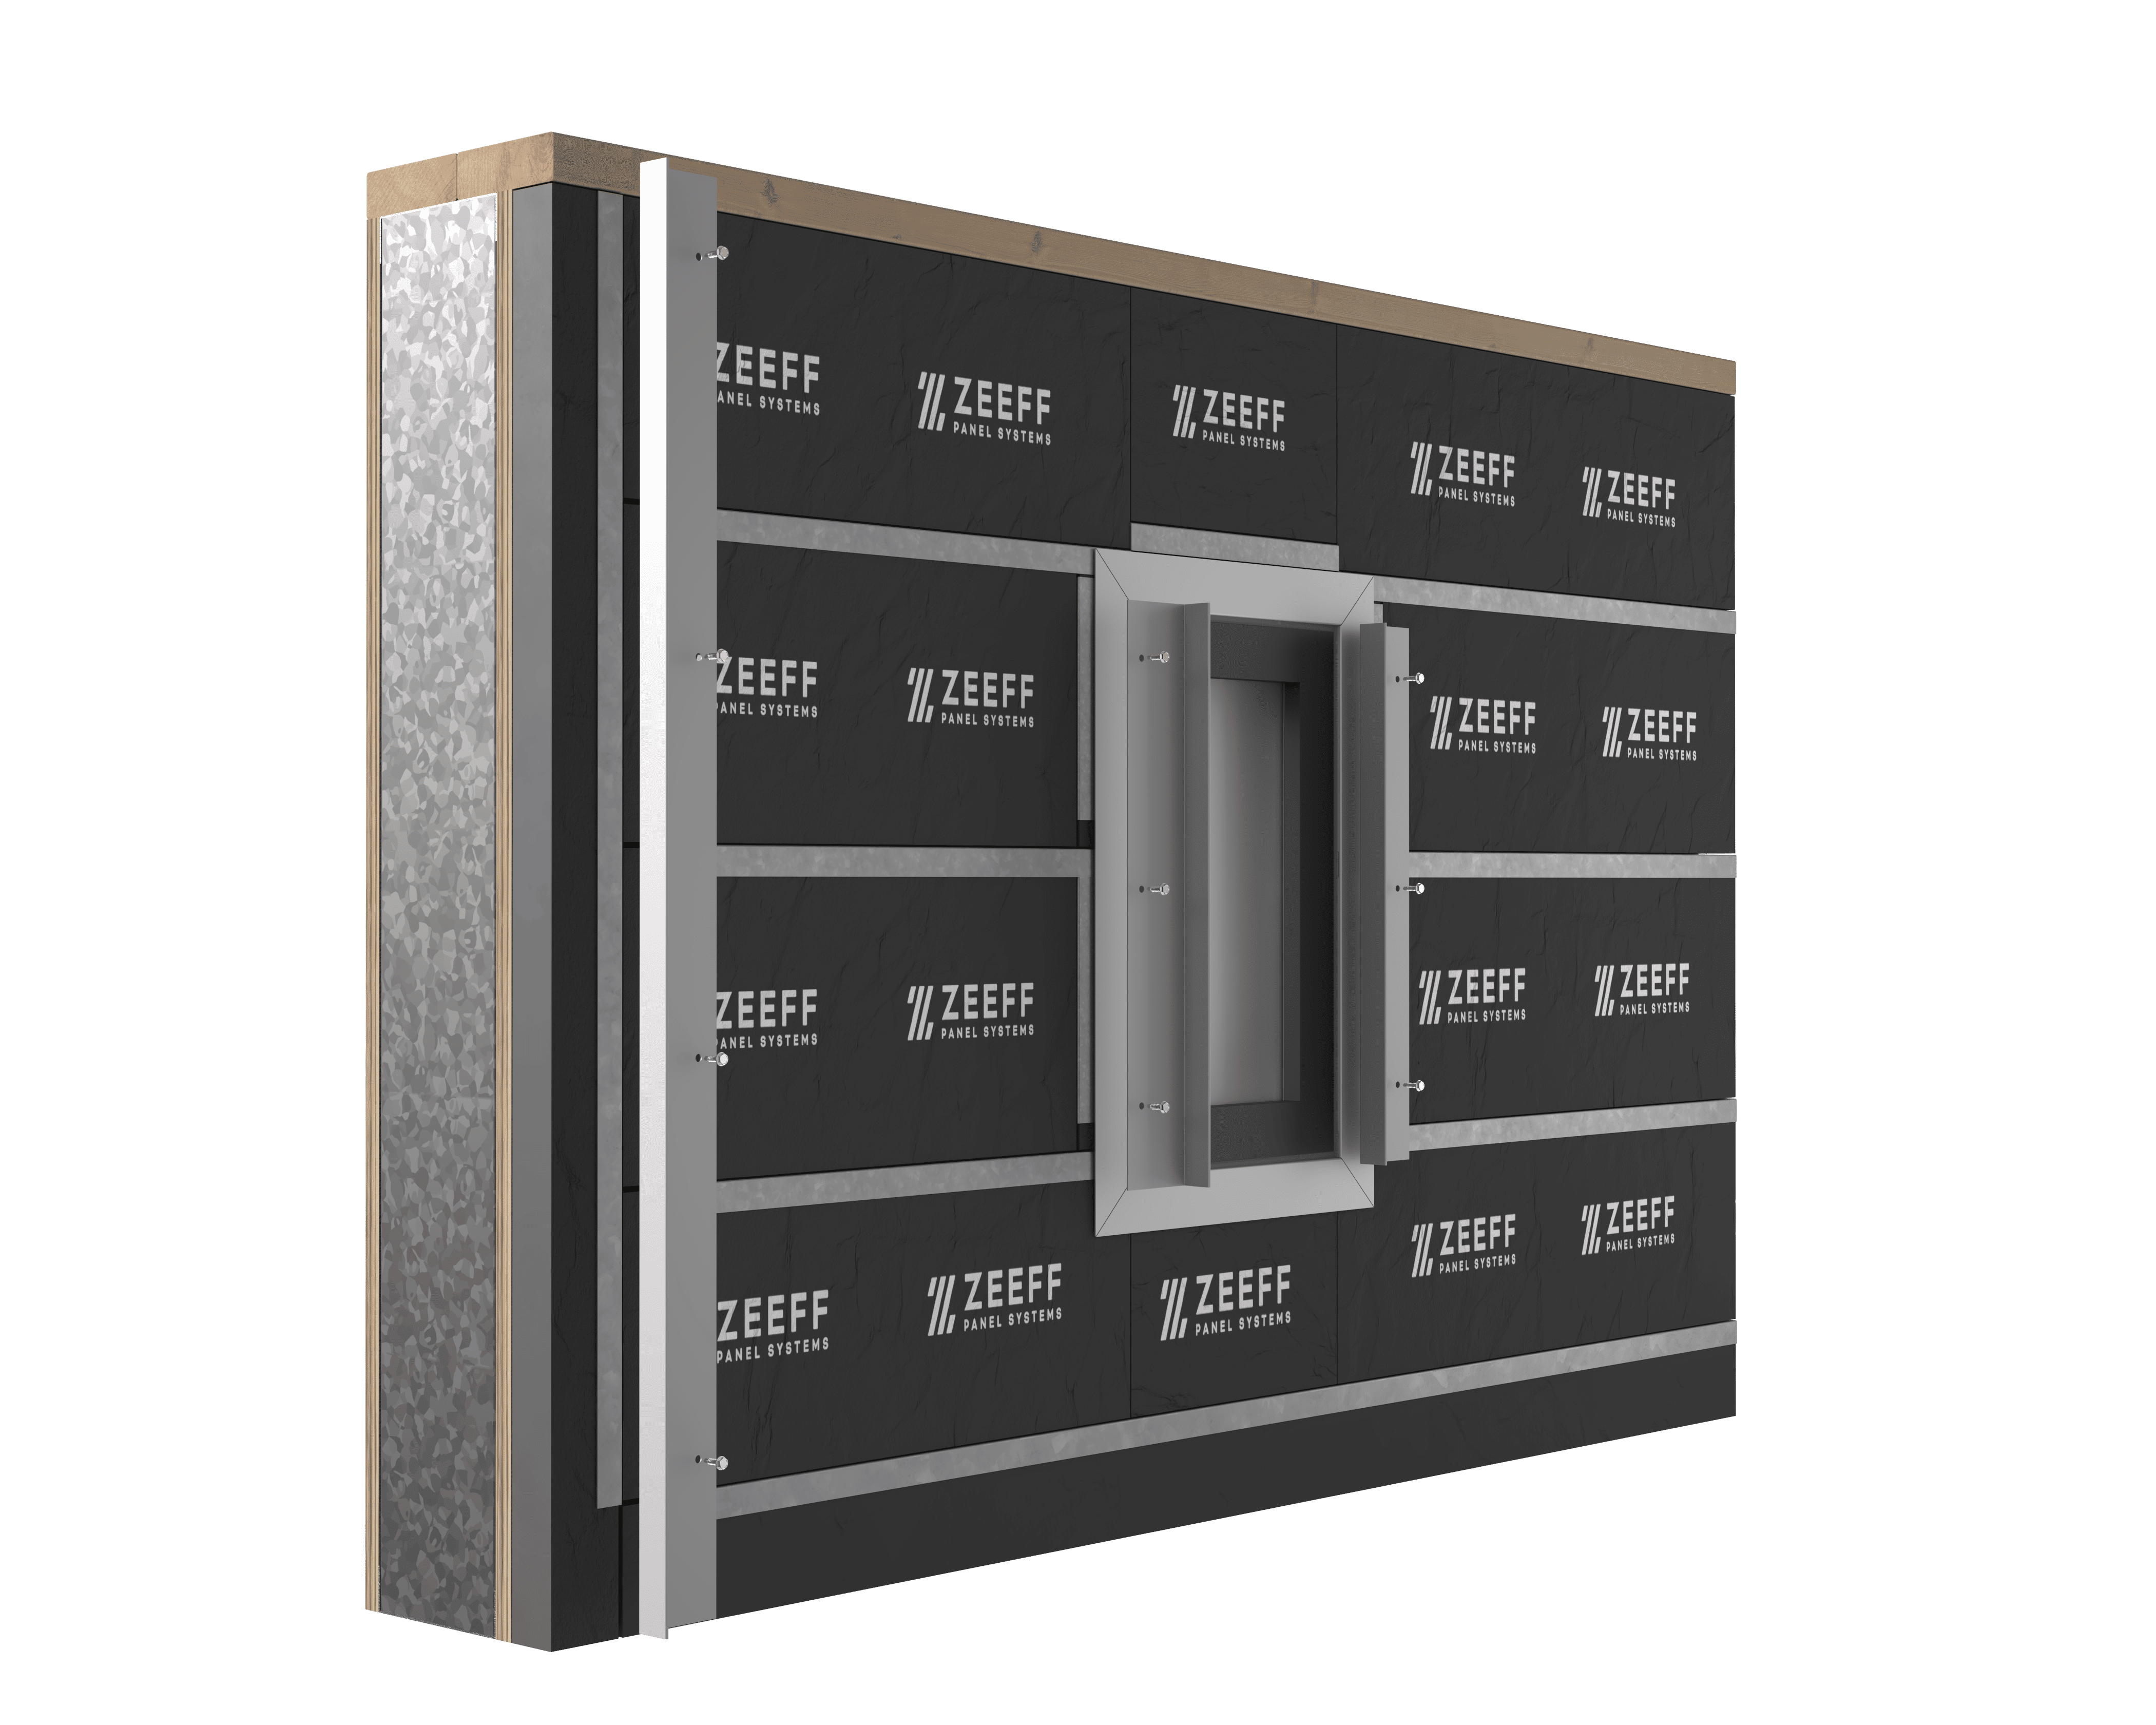
Install the 2 piece J extrusion backpiece where needed.
Drill weep holes as need at the bottom.
%20(1).png?width=7500&name=3%20(1)%20(1).png)
%20(1).png?width=7500&name=7%20(1)%20(1).png)
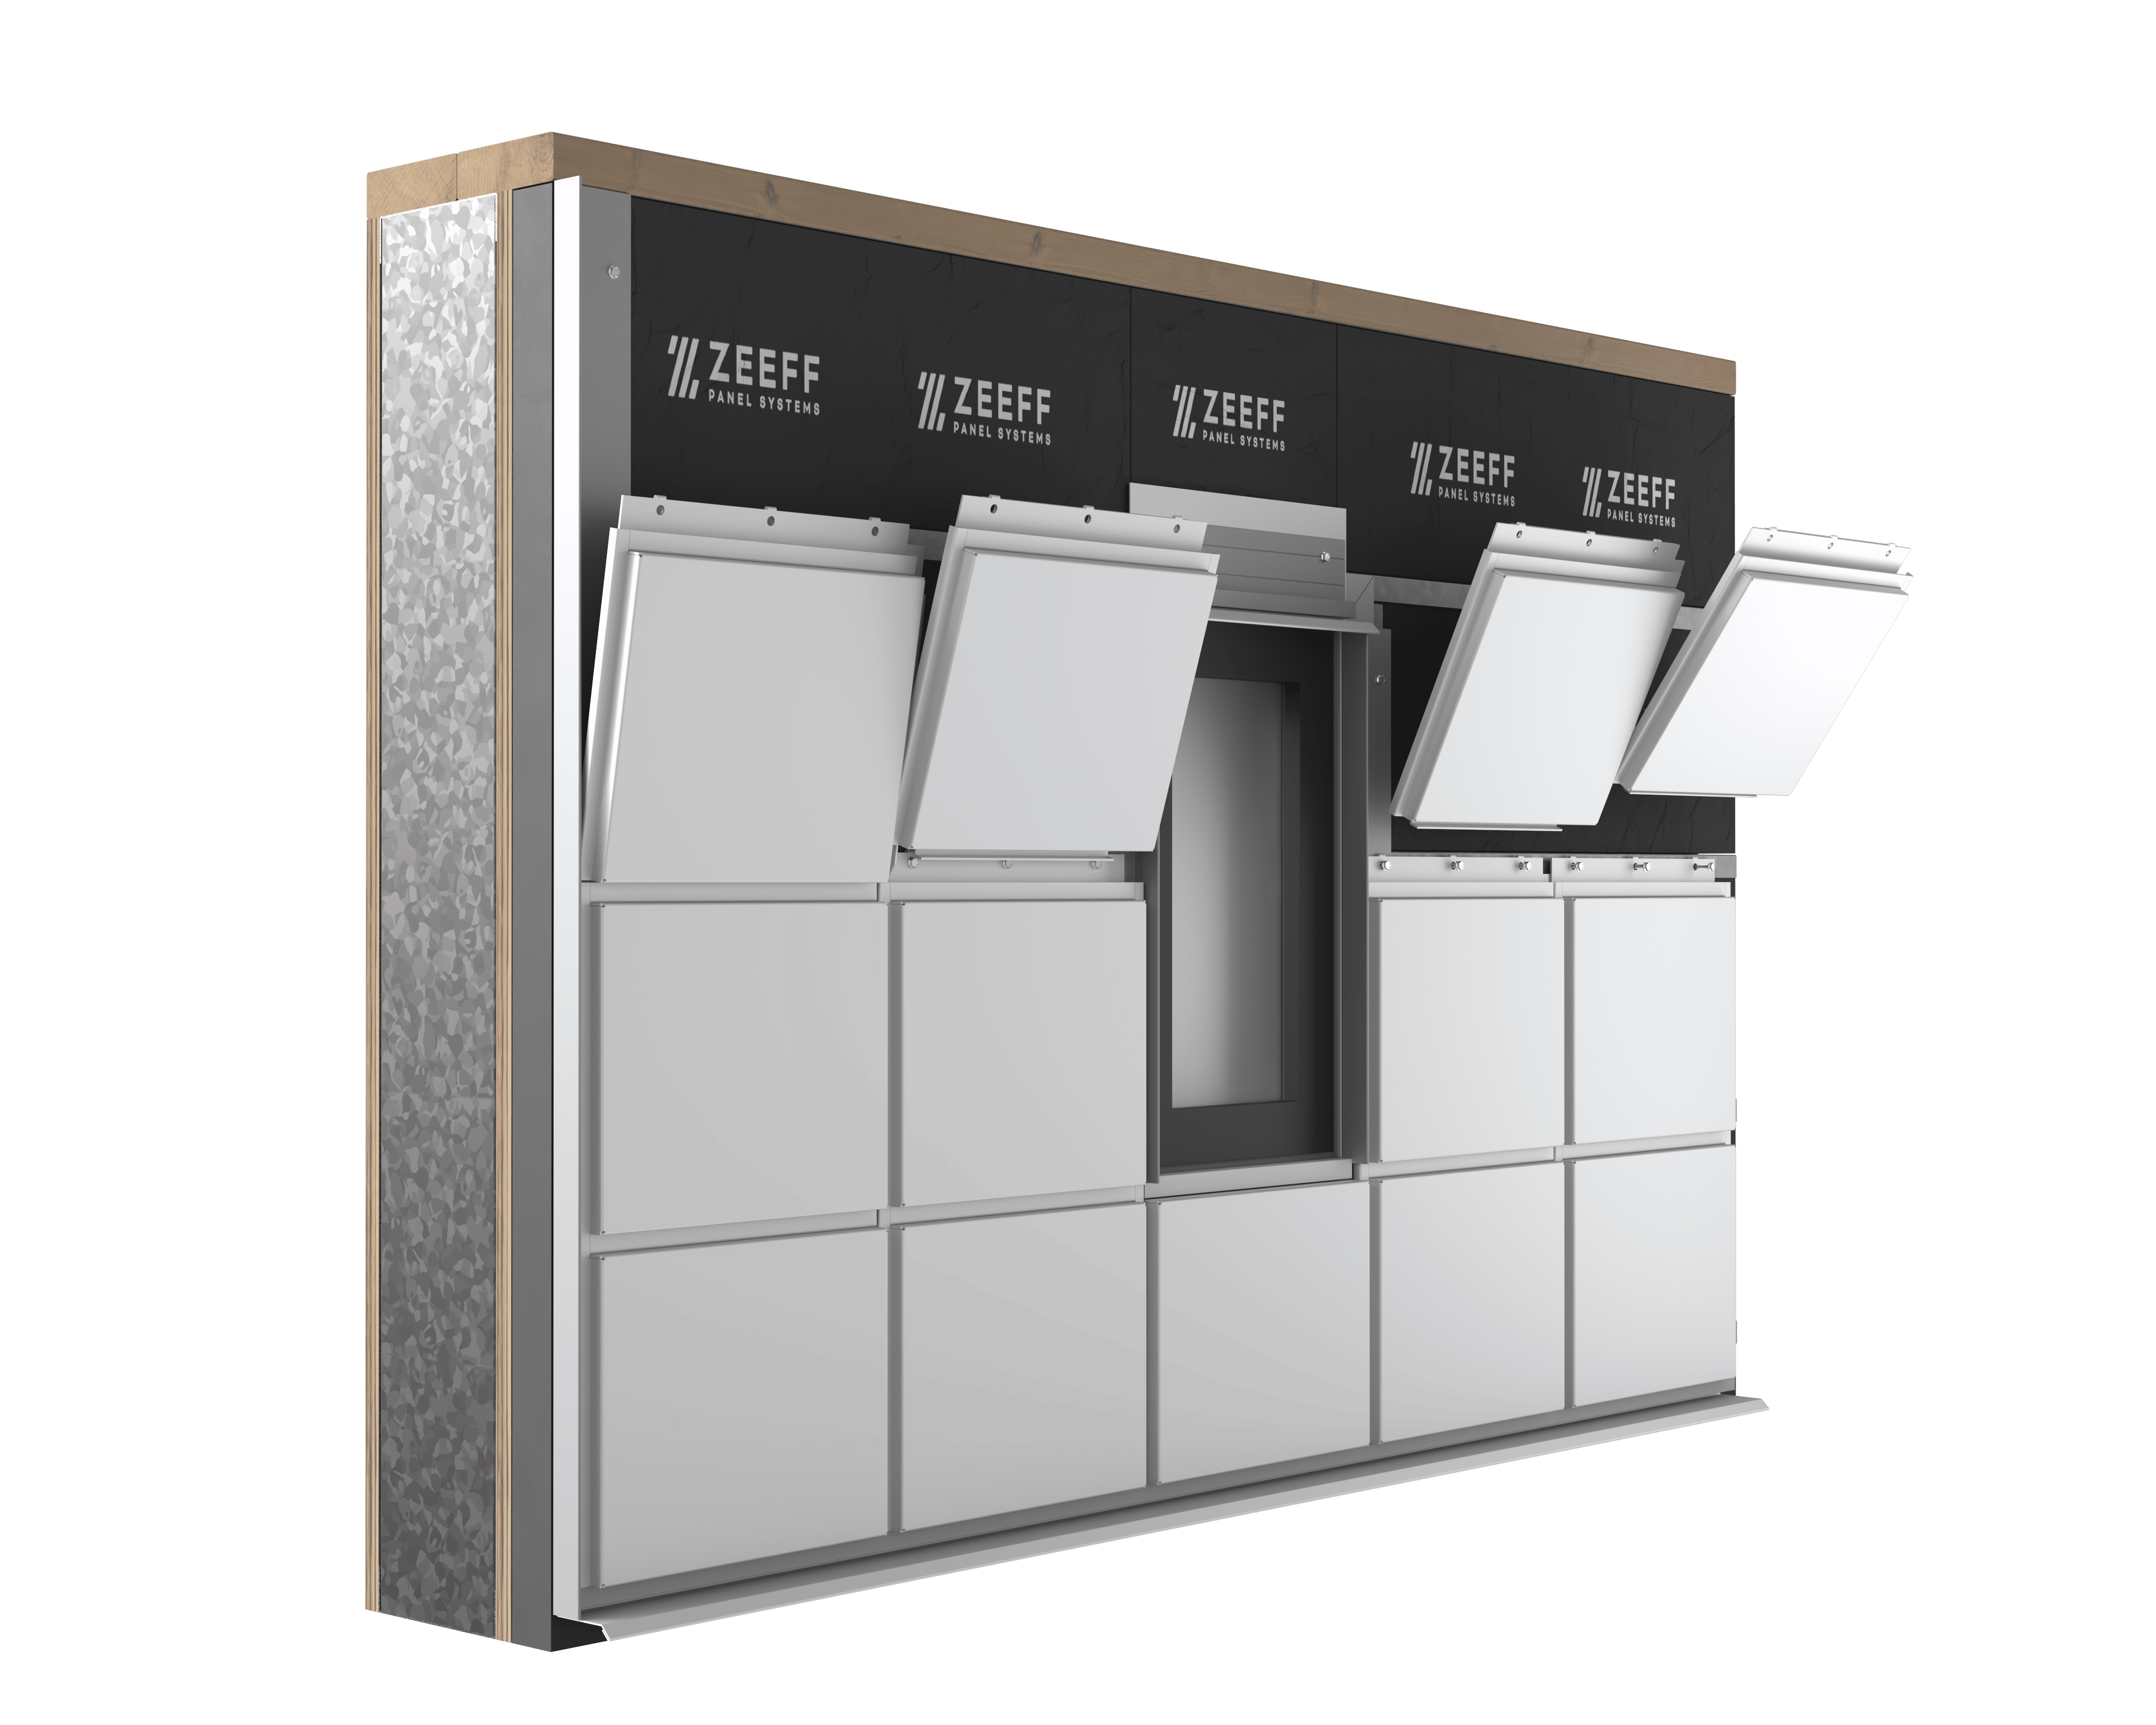
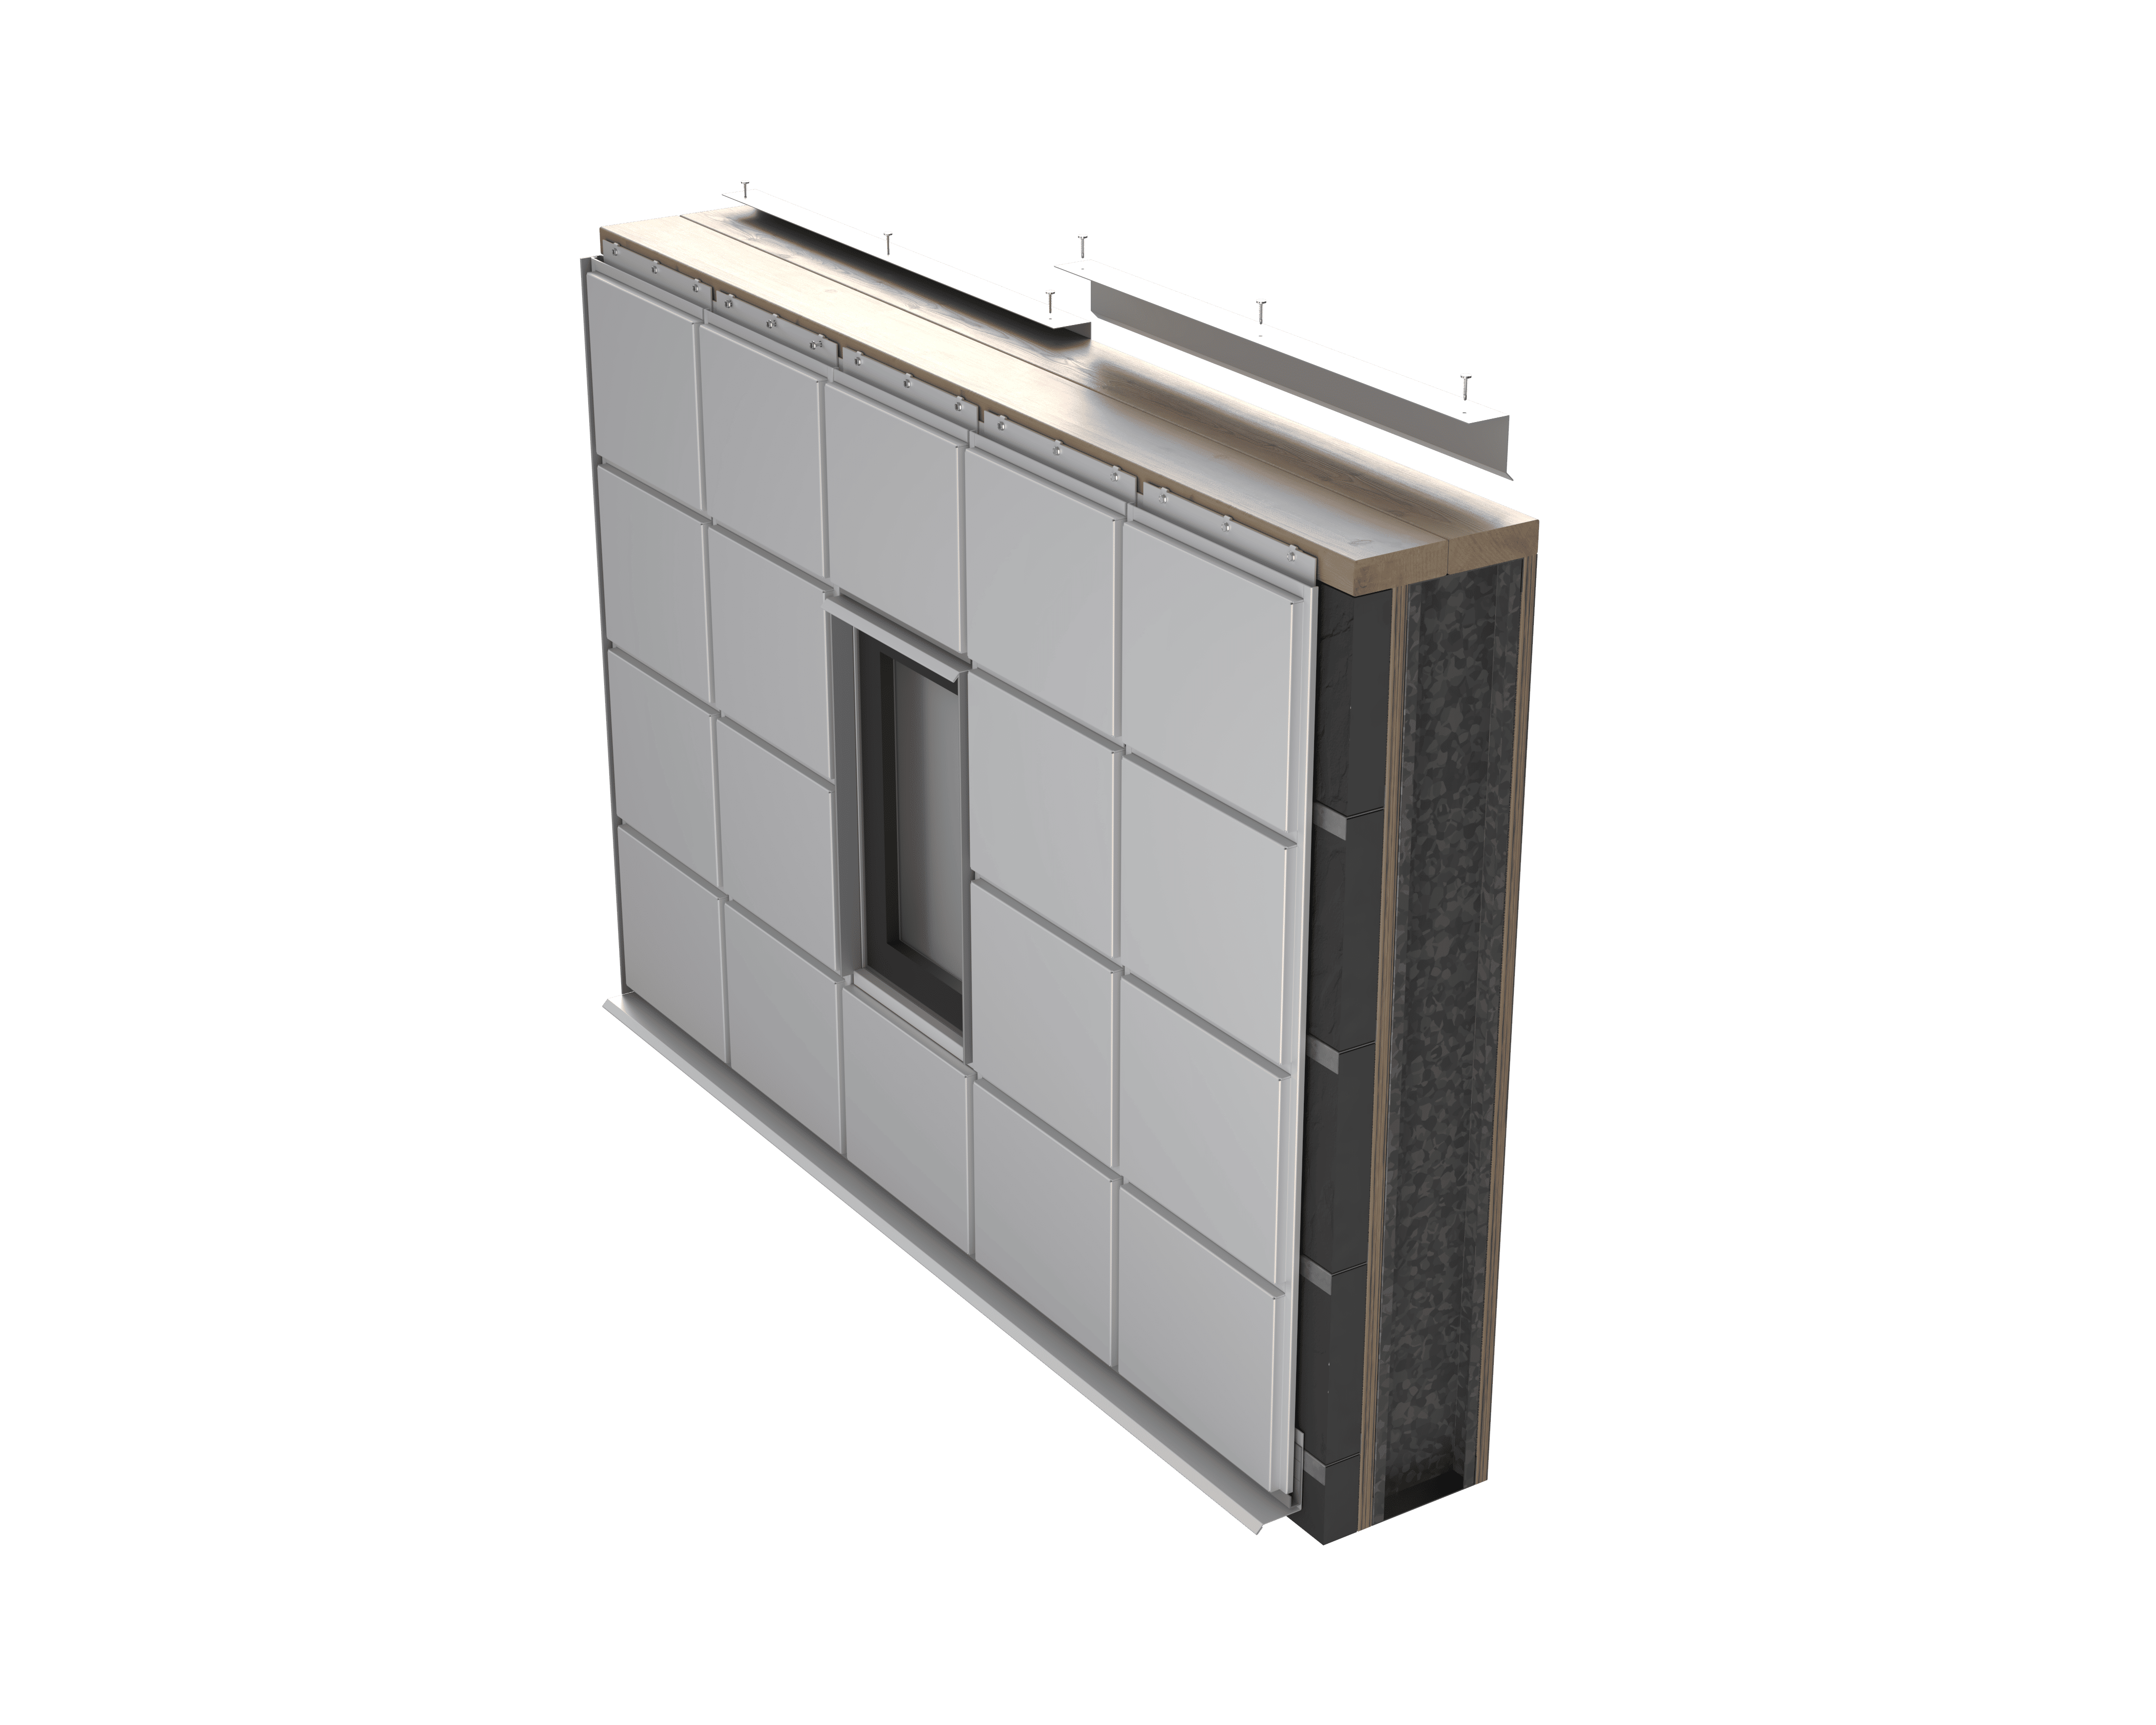
Field trim panels as needed to accommodate site conditions.
Begin installation at the bottom left corner of the assembly.
%20(1).png?width=7500&name=11%20(1)%20(1).png)
%20(1).png?width=7500&name=13%20(2)%20(1).png)
%20(1).png?width=7500&name=14%20(2)%20(1).png)
Technical Information
| Material | .080" Post Anodized Aluminum, .080" Post Painted Aluminum |
| System Depth | 1-1/4" nominal standard, Up to 6" |
| Material Weight | Less than 2 lbs. / s |
| Panel Joints | 5/8" nominal (1/8" - 1" available |
| Material Finish | 70% PVDF | 100% FEVE, AAMA 2605 |
| Warranty | 20 years for paint | 2 years for MFG |
Technical Information
| Material | .125" Post Anodized Aluminum, .125" Post Painted Aluminum |
| System Depth | 1-1/2" nominal standard, up to 10" |
| Material Weight | Less than 2 lbs. / s |
| Panel Joints | 5/8" nominal (1/8" - 1" available |
| Material Finish | 70% PVDF | 100% FEVE, AAMA 2605 |
| Warranty | 20 years for paint | 2 years for MFG |
Technical Information
| Material | 1.0mm Zinc |
| System Depth | 1-1/4" nominal standard, up to 3" |
| Material Weight | ≈ 2 lbs. / sf |
| Panel Joints | 5/8" nominal (1/8" - 1" available) |
| Material Finish | Naturel | Neo | Noir | Nuance |
| Warranty | NedZink - Material, 10 years | 2 years MFG |
Technical Information
| Material | 1.5mm Zinc |
| System Depth | 1-1/4" nominal standard, up to 3" |
| Material Weight | ≈ 2 lbs. / sf |
| Panel Joints | 5/8" nominal (1/8" - 1" available) |
| Material Finish | Naturel | Neo | Noir | Nuance |
| Warranty | NedZink - Material, 10 years | 2 years MFG |
Technical Information
| Material | 18 GA | A606-4 Weathering Steel |
| System Depth | 1-1/4" nominal standard, up to 3" |
| Material Weight | ≈ 3 lbs. / sf |
| Panel Joints | 5/8" nominal (1/8" - 1" available) |
| Material Finish | Mill Steel - Naturally Weathering |
| Warranty | 1 year for MFG |
Technical Information
| Material | 16GA | A606-4 Weathering Steel |
| System Depth | 1-1/4" nominal standard, up to 3" |
| Material Weight | ≈ 3 lbs. / sf |
| Panel Joints | 5/8" nominal (1/8" - 1" available) |
| Material Finish | Mill Steel - Naturally Weathering |
| Warranty | 1 year for MFG |
Technical Information
| Material | 18 GA | 316 Stainless Steel |
| System Depth | 1-1/4" nominal standard, up to 3" |
| Material Weight | ≈ 3 lbs. / sf |
| Panel Joints | 5/8" nominal (1/8" - 1" available) |
| Material Finish | Polish, Brushed, Angel Hair, 2B |
| Warranty | 2 year for MFG |
.png?width=300&name=select%20&%20lite%20technical%20product%20guide%20(1).png)


.png?width=300&name=Installation%20background%20(1).png)


.png?width=300&name=premier%20technical%20product%20guide%20(2).png)

.png?width=300&name=ctf%20details%20(1).png)

.png?width=300&name=ws%20specs%20(1).png)
.png?width=300&name=Painted%20Aluminum%20(2).png)

.png?width=300&name=Nedzink%20(6).png)